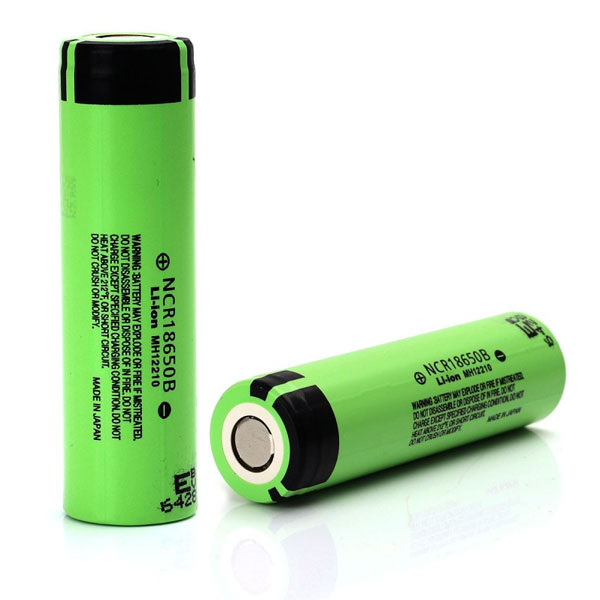
The world is moving away from fossil fuels and one day it will be fully electric. Lithium-ion is one of the most promising technologies of all batteries in the world today. Many laptops, RC robots, drones, medical devices, power tools, e-bikes, and electric vehicle (EV) battery packs are based on the 18650. It is one of the most mature lithium-ion battery formats, produced in large quantities and enjoys low cost per watt-hour.
The 18650 Lithium-Ion battery is an excellent way to power projects. This provides a nominal voltage of 3.7V, which is not enough for most applications, because let's say you want to control a BLDC motor with an ESC, this ESC needs 9V to start, so we need to get more power by connecting them in series high voltage. This article discusses how to build an 18650 Li-Ion battery pack with a BMS circuit, and everything you need to learn before building it!
Below are the steps required to make an 18650 battery pack.
1- Check the battery and charge it
First, we need to test the efficiency of all cells to make sure all cells have the same voltage. All batteries must be at the same voltage, as the batteries could eventually charge each other and cause unexpected results.
2 - Calculation
The 18650 battery is capable of supplying 3.7 V nominal, 3 V minimum and 4.2 V peak. So if we consider the nominal voltage, 6 cells in series will give us 22.2 V, which is the configuration of the 6S1P. Among them, 6S represents 6 batteries in series, and 1P represents 1 battery in parallel. By adding another 6 batteries in parallel, we can not only double the capacity, but also provide the number of current packs.
3 Piece Construction and Spot Welding
For building kits, it is recommended to buy small black plastic spacers that snap like Lego bricks to make the battery pack, this is very useful as we don't need to use adhesives. Now make 2 pairs of 6 plastic spacers, inserting alternating patterns into the cells.
After that, measure the distance between the two batteries, which is about 25mm. So you have to mark it 25mm with nickel ribbon and cut it with sharp scissors. Now place the nickel strip on top of the battery and use a spot welder to connect the nickel strip to the top of the battery to make a series connection.
Now you can install and plug in the XT60 and label it for a day, but you can also add a BMS (battery management system) that brings overload, overdischarge, and some battery packs even have a balance charge feature. We just need to solder it to the battery pack. Many BMS don't offer Balance loading either, so you'll need to add the Balance charging connector and you're done!
Figure 1 18650 battery pack complete

It is necessary to know what is needed to make a 18650 battery in order to make arrangements before starting to make the battery, which will eventually save you time, the things needed are as follows;
1-18650-Lithium-ion battery
18650 cells are used in everything from laptop batteries to electric cars. It is a rectangular cylindrical lithium-ion battery with a diameter of 18 mm and a length of 65 mm (approximately 1/10 of a mm). You can buy them online from sites like banggod.com in packs of 4 or 6, or from old laptop batteries.
2-Battery management system
A battery management system (BMS) is an electronic system that manages a rechargeable battery (cell or battery pack), such as preventing the battery from operating outside its safe operating area, tracking its status, measuring secondary data, reporting data, managing, validating, and regulating its environment. This effectively increases overcharge, overdischarge safety, and some of them also provide a balance shift.
3-Plastic gasket
Replace the typical universal glue with a qualified battery holder, the combination is very convenient, the contact is better, and the maintenance of the battery is also convenient.
4 spot welder
One of the purposes of spot welding is to fuse two or more components together in a primarily permanent manner. You can buy one or rent one.
5 - Nickel Tape
Nickel tape is widely used in battery construction because of its ease of use in spot welding and welding, and its high corrosion resistance over time, which is why you need it.
Compare Make vs Buy 18650 Batteries
To compare whether it is better to make an 18650 battery or buy it, let's take an example, then the results can be easily evaluated
A guy decides he needs 13 18650 cells in series
Compute, but choose to double the capacity by adding another 13 in parallel. This gives him a battery pack with a capacity of 5 Ah, a nominal voltage of 48.1 V, and a battery pack that can supply 40 A regulated current. He bought a kWeld battery spot welder instead of connecting them by welding nickel strips, adding to the build cost. He uses a bench power supply to power his new battery pack and has installed a battery management system (BMS) to worry about inconsistent loading of the battery pack over the life of the pack. The resulting battery pack is ideal for use in e-bike engines.
He found that, after all costs, it was only slightly cheaper than the equivalent eBay battery pack, which costs 24.4 euros per Ah ($29.50 per Ah). The only way to make it cheaper is to make multiple battery packs, thus spreading out the one-time cost of a battery spot welder. So that means there's not much difference in the price of buying new or making it at home, so it's up to you to choose.
